
Reading Time: 7 minutes read
The most important element of any photograph? Light. It makes or breaks your image. Unfortunately, we tend to be most active at midday, a time when the sun projects some difficult light to work with. Midday light can be harsh, manifests dark and unflattering shadows, and can wash scenes out.
So where do photographers find light that makes the world appear calm, peaceful, and dreamlike? They don’t fight the midday sun; they wait for the sun to bring the good stuff to them.
They take their photos during the golden hour.
What is the golden hour?
The golden hour is the time of day when the sun’s light is warm and diffuses evenly across the world and sky.
Its signature palette comes from the sun’s angle. When the sun hangs low over the horizon, the light must travel through more atmospheric molecules than during midday. As a result, the high-frequency blues in the spectrum scatter more, but the low-frequency oranges and yellows reach us to bathe the world in their warm hues.
Of course, the golden hour can be more or less dynamic on any given day. It depends on factors like time of year and cloud coverage, too.
When is the golden hour?
The golden hour occurs twice a day. The first golden hour happens immediately after sunrise; the second one right before sunset.
But sunrise shifts with the time of year. In the summer, the morning golden hour will occur much earlier than in the winter. Conversely, summer’s evening golden hour happens much later. (Unless you live in the southern hemisphere, in which case: strike that, reverse it.)
You can figure out your daily golden hours if you know when sunrise and sunset take place. Alternatively, you can use an online calculator, like this one.
Oh, and the “hour” in the name is figurative. It can be longer or shorter depending on a bunch of factors. Still, thinking in terms of an hour provides a good rule of thumb.
Plan ahead
The golden hour won’t stick around for you, so you have to plan for it.
Ensure all of your gear is packed and ready to go beforehand. Then determine where you’ll shoot and what your subject will be. You may need to coordinate with any friends or family members you want to include.
Remember: the sun rises in the east and sets in the west. This means the light will be projected from different directions. Knowing which direction the sun is headed will help you find the composition you want, especially when shooting cities or landscapes.
With all this said, we admit there’s something special about just being in the world and letting spontaneity guide you. But if you’re aiming for a particular shot, it’s best to have a plan.
Choosing a subject
Warm, diffused light makes everything look good, so you can’t go wrong when choosing a golden hour subject.
The golden hour’s warmth makes people come alive, landscapes look like they’ve been preserved in amber, and architecture pops out of the frame with a sense of magnitude.


The golden hour’s colors and softness make people and places look inviting and cheery. If you’re going for pensive, doleful, or mysterious, you’ll need different light. Maybe try the blue hour instead.
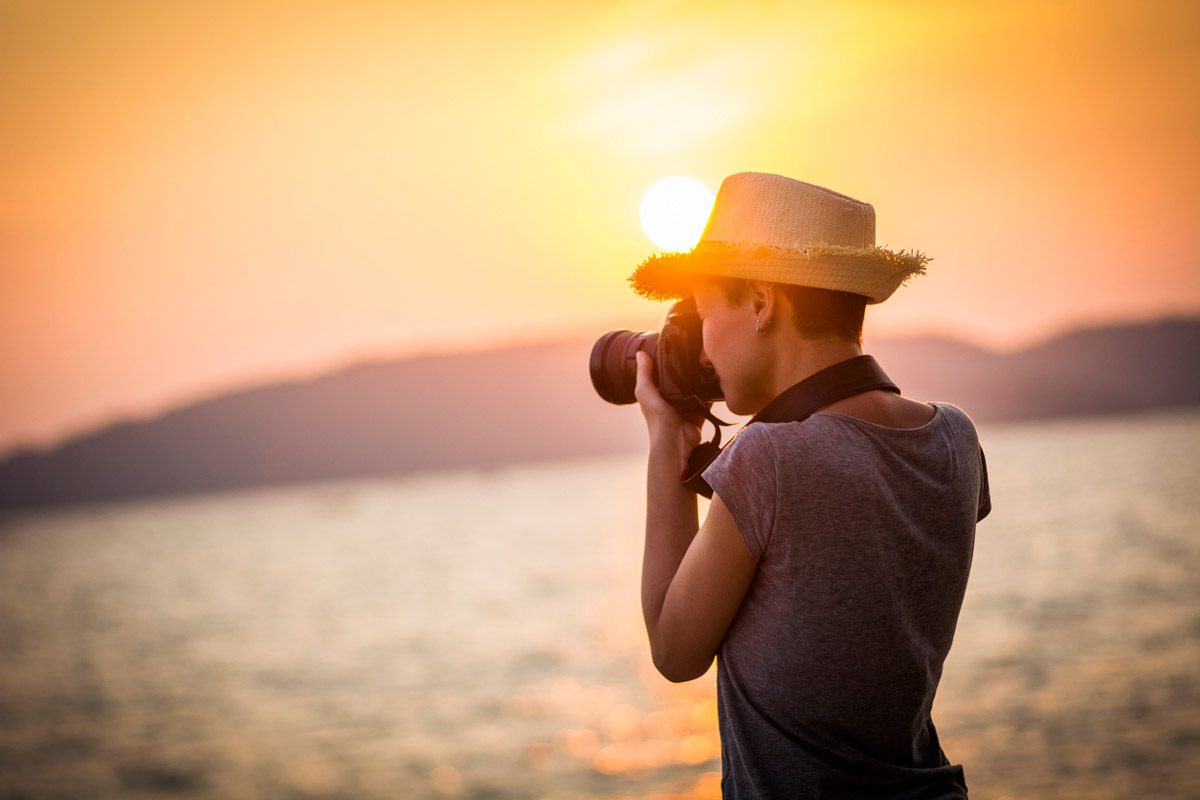
Front lighting with the golden hour
Illuminate your subject from the front, and the sun does most of the work for you. Because the golden hour provides even light, it is incredibly flattering and allows your camera to capture rich details.
With the sun low in the sky, shadows also elongate across the ground. Try to include these in your compositions as they add depth and a nice three-dimensional effect.
Remember: the sun is either rising or sinking during the golden hour. In response, the light will shift quickly and dramatically. If you aren’t seeing the shots you want, waiting a few minutes or adjusting your location can reveal them.
Backlighting with the golden hour
Backlight won’t exhibit your subject the same way front light will. Even so, it’s worth experimenting with putting the sun behind them. It can create some awesome effects. Here are few to try:
Flare lighting. You get a lens flare when the sun’s light streams directly into your lens. Depending on the angle, it can appear as a brilliant haze or starbursts. These can give your subject a halo effect or add a fantastical element to a nature shot.
Rim lighting. Rim lighting is when the backlight outlines the subject with a thin line of light, separating it from the background. It can be difficult to get the angle, but it adds a suggestive, minimalist quality to the photo.
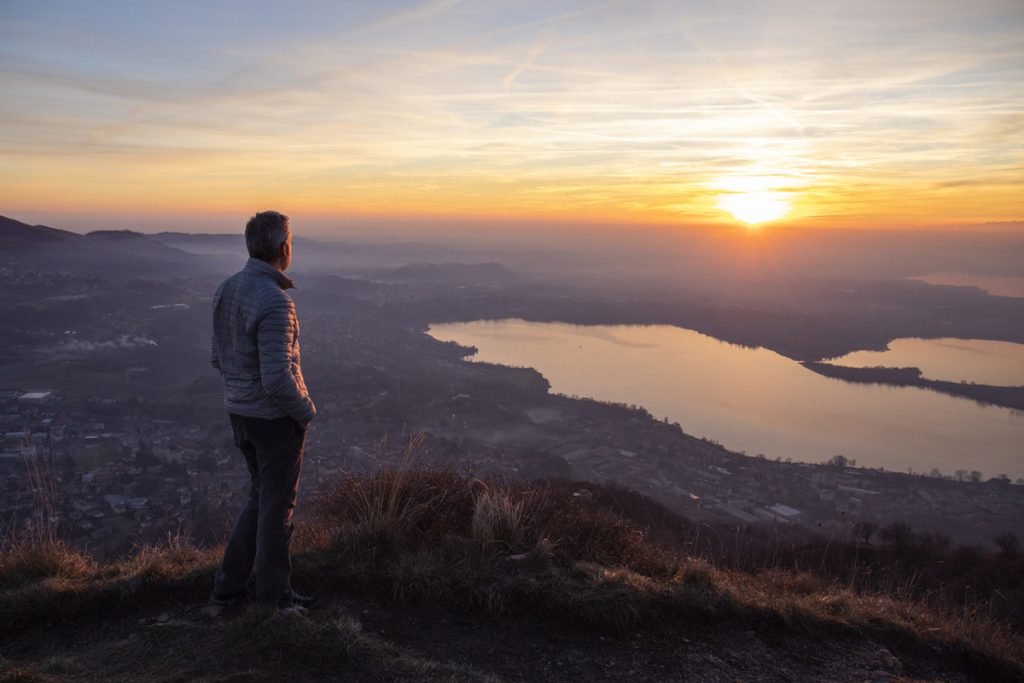
Silhouette. When the sun is just right, everything becomes a shadow against a gleaming backdrop. The sun cuts your subjects out of the scene but leaves all the little details. Great for profiles.
Shadows. Just like with front light, long shadows add a depth and dimension. Try to find ways to use them in your backlit compositions, too.
Golden hour camera settings
Once you’ve set your angles and subject, it’s time to make sure your golden hour camera settings are ready for your photoshoot.
When you’re shooting, try using a low aperture priority mode ranging from f/1.8 to f/2.8. As the sun is going down, increase the ISO. If your golden hour photoshoot consists of just landscape views, use a low shutter speed of 1/125. And if you are shooting family portraits or photos with a bit of movement use a shutter speed of 1/250 or higher.
Golden hour portraits
Let the golden hour’s light filter across their faces. It adds a natural glow to skin tones and enhances beauty and personality.
Depending on the sun’s angle, your friends and family may be able to look directly toward the sun, or it may cause squinting. If the squint happens, don’t panic—simply adjust. Consider side lighting them instead. Sidelight will add shadows that give a sense of texture.

If you’re using an iPhone with Portrait mode, or a camera with a similar feature, give it a go. Portrait mode loves quality, diffused lighting. Exactly what the golden hour was made for
Add these photos to a Motif photo book
One golden hour is never the same as the last. You may go searching for one shot and find something completely unexpected. That’s how memories are made.
But what do you do with those memories? Instead of abandoning them to a hard drive folder, why not use them to design a photo book?
With Motif, you can choose from a variety of themes to present your golden hour photos. The app also features many professional layouts to choose from, alongside intuitive tools if you want to create your own.
You can create a photo book to chronicle a year’s worth of golden hours or add them to any other photo book. Love, family vacations, landscapes—whatever topic you chose for your next photo book, golden hour photos add vibrancy and beauty.


